


Custom Domain
Set up a Custom Domain
By default, your Ideanote workspace can be accessed on a free Ideanote subdomain like yourcompany.ideanote.io.
With Custom Domain, you can replace this with a domain you own like ideas.yourcompany.com so your workspace feels like a seamless part of your brand.
Before You Begin
Make sure you have the following in place before starting:
✓ Workspace Owner role: Only Workspace Owners can access and edit Custom Domain settings. Admins, Members, and Guests cannot configure this.
✓ A paid Ideanote plan: Custom Domain is not available on the Free plan. Check the Ideanote Pricing page for plans that include this feature.
✓ A domain you own: You need a registered domain that you or your company own.
✓ Access to your DNS settings: You'll need to log in to your domain registrar's dashboard and add a DNS record. If your organization manages DNS centrally, you may need to involve your IT team.
How to Set up Your Custom Domain
Setting up a custom domain for your Ideanote workspace takes just a few minutes. It involves two parts: entering your domain in Ideanote, then adding a DNS record with your domain registrar.
Step 1: Enter Your Domain in Ideanote
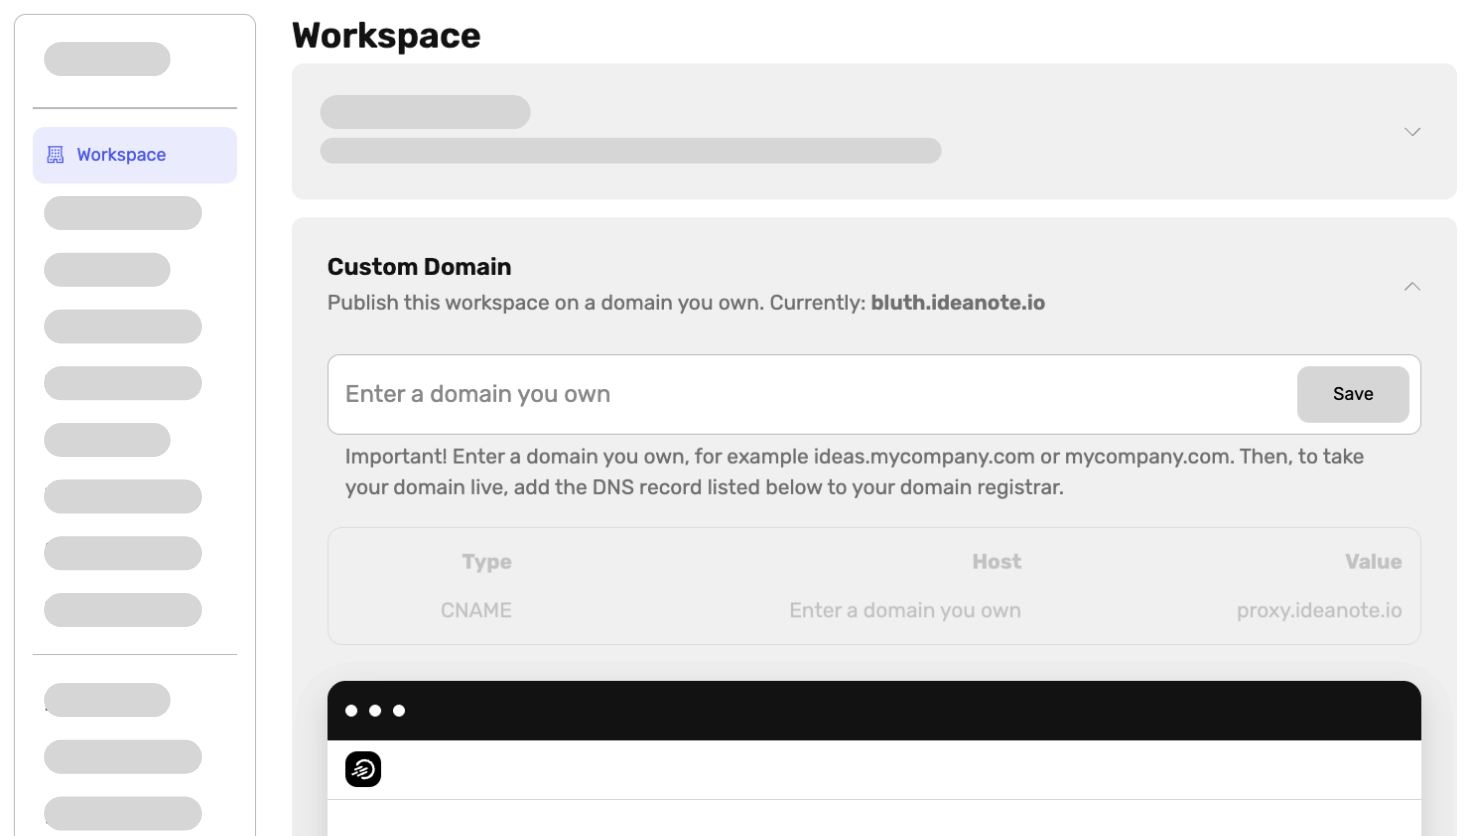
1. Go to Settings → Workspace → Custom Domain in your Ideanote workspace.
2. In the Custom Domain section, type the domain you want to use and that you own. For example, ideas.yourcompany.com or yourcompanyinnovationproject.com. You'll not need to include the https:// part of the url, just the name of the domain.
3. Click Save.
4. Ideanote will display the DNS record you need to add at your domain registrar. You'll see a table with three columns: Type, Host, and Value. The value depends on your data residency settings.
|
Type |
Host |
Value |
|
CNAME |
e.g. ideas.yourcompany.com |
Depending on data residency, for EU: proxy.ideanote.io for SA: proxy.sa.ideanote.io for UAE: proxy.ae.ideanote.io for US: proxy.us.ideanote.io for CA: proxy.ca.ideanote.io |
Step 2: Add the CNAME Record at Your Domain Registrar
After saving your domain in Ideanote, you'll be shown a CNAME DNS record to add.
Here's how to add the record with some of the most popular domain registrars:
GoDaddy: Go to My Products → DNS → Add Record. Select CNAME as the type and enter Host and Value fields.
Cloudflare: Go to your domain → DNS → Records → Add Record. Select CNAME, enter the subdomain as the Name, and proxy.ideanote.io as the Target. Set Proxy status to "DNS only" (grey cloud).
Namecheap: Go to Domain List → Manage → Advanced DNS → Add New Record.
Hostinger: Go to Domains → Manage → DNS / Nameservers → Add Record.
Porkbun: Go to Domain Management → DNS Records.
If your registrar is not listed above, the process is very similar. Look for a DNS Records or DNS Management section in your domain provider's dashboard. For detailed instructions, refer to your registrar's own help documentation.
Step 3: Wait for DNS Propagation
After adding the CNAME record, DNS changes can take anywhere from a few minutes to up to 48 hours to propagate worldwide, although it typically happens within a few hours.
Once propagation is complete, your Ideanote workspace will be accessible at your custom domain. Ideanote uses Let's Encrypt (an automated and trusted certificate authority) to provision an SSL/TLS certificate for your domain for free. This means your workspace will be served securely over HTTPS at no extra cost or effort on your part.
Important Notes
IT and Network Considerations
If your organization uses a corporate firewall or proxy, your IT team may need to whitelist your custom domain (e.g. ideas.yourcompany.com) or the associated IP addresses so that employees can access the workspace from within your network. This is outside the scope of the Ideanote custom domain setup and depends on your organization's network policies.
Custom Domain ≠ Email Sending Domain
Setting up a custom domain changes where your workspace lives on the web — it does not change the address that Ideanote sends emails from. By default, notification emails are sent from an Ideanote address (e.g. noreply@ideanote.io), not from your custom domain.
If you want emails to come from your own domain (e.g. noreply@ideas.yourcompany.com), that requires a separate configuration using Ideanote's SendGrid integration.
Subdomains vs. Root Domains
We recommend using a subdomain such as ideas.yourcompany.com or innovation.yourcompany.com rather than a root domain (yourcompany.com) but both are possible.If you are using Ideanote for an event or a project, a project domain could be used instead, e.g. yourcompanyproject.com
Troubleshooting
My custom domain isn't working after 48 hours.
Double-check that the CNAME record is correctly configured in your DNS settings. If you are in doubt you can check the propagation status using a free tool like whatsmydns.net.
I see a security/certificate warning in my browser.
Ideanote uses Let's Encrypt to automatically provision SSL certificates. Certificate issuance may take a few minutes after DNS propagation completes.
My organization's firewall is blocking the domain.
Ask your IT team to whitelist your custom domain and/or the proxy.ideanote.io address. Ideanote cannot resolve internal network restrictions on your behalf.
I want to change my custom domain later.
You can update your custom domain at any time by going to Settings → Workspace → Custom Domain, entering a new domain, and updating your DNS records accordingly. Remember to remove or update the old CNAME record at your registrar.